Background agents and worktrees in VS Code 1.107
Table of Contents
Background agents
Like every release, the VS Code 1.107 release is jam packed with new features.
There are two in particular that took me a second to fully grasp, so I wanted to share my learnings here.
First, one the marquee features of this release is background agents, and there’s a new documentation article that outlines the agent landscape in VS Code.
We now have three ways to pass work to a background agent in VS Code [1]:
@cloud@cli/delegate
The first two are somewhat obvious. If you type @cloud do this thing, the do this thing prompt starts a fresh Copilot coding agent run that happens on GitHub Copilot cloud. Running @cli do this thing runs the same prompt but in a Copilot CLI agent.
However, the last command caused me some confusion. At the time of writing, if you type /delegate in the Copilot chat window in VS Code, the following happens:
/delegateautocompletes to@cli /delegateand- The following message appears in the text entry box:
Delegate chat session to cloud agent and create associated PR
My initial confusion: why is @cli involved if the agent session runs on the cloud? If @cli is involved, wouldn’t this run locally?
It turns out that there are some UI ergonomics and assumptions going on. In the Copilot CLI terminal, there’s also a /delegate command that allows you to pass work to the cloud agent.
After running this by the VS Code team, it appears that /delegate autocompleting to @cli /delegate is basically assuming that you were wanting to run this from the context of the Copilot CLI - which, as we explained above, supports a /delegate command.
So in summary: if you type /delegate in the VS Code Copilot chat window, it actually runs a cloud agent session, even though the @cli /delegate appears. It’s a bit of a UX quirk, and the VS Code team is aware of the ergonomics concern here.
Worktrees
Supporting the concept of background agents is the concept of worktrees. Worktrees have been a concept in Git for a while, and currently it’s the method that allows sandboxing when running @cli background agents in VS Code. What do I mean when I say sandboxing? When an agent sandboxes your work, it prevents those file changes from interfering with your file system’s main working directory. We’ve seen editors adopt other sandbox approaches; for example Cursor uses something called macOS Seatbelt for its local agent sandboxing.
When you run a @cli background agent in VS Code, the agent creates a duplicate of your my_project repo in the same working directory called my_project.worktrees. The @cli background agent then works off this worktree directory. Pretty simple.
That said, if you’re like me and you do the following tasks before merging AI generated code, the worktree flow in 1.107 may cause some confusion:
- Ask a local agent in VS Code to do some work.
- Use Git to review each file one-by-one, staging files as I go, asking the agent for iterations as needed. (In my case I’ve been leaning on the Git extension in VS Code lately for this).
- Once ready to merge, I just follow the standard Git flow of committing and pushing my changes.
The new worktree features in 1.107 assume a different flow. Here’s how to use worktrees in this release:
-
Preface your command with
@cli. This will pass off work to the Copilot CLI agent, async:
-
Hit enter, and this will send the task to the background agent. In the background agent chat text entry area, you’ll now see a that’s operating in the worktree:

-
You should have a duplicate of your repo in the same working directory that looks like
my_project.worktrees. If youcdinto this directory, you’ll see the worktree containing your repo’s files. It’s thisworktree-2025-12-16T16-19-12directory that is the sandbox where the background agent makes changes:
$ cd my_project.worktrees$ lworktree-2025-12-16T16-19-12-
Once the background
@cliagent finishes its changes, you then have to click the “Keep” button: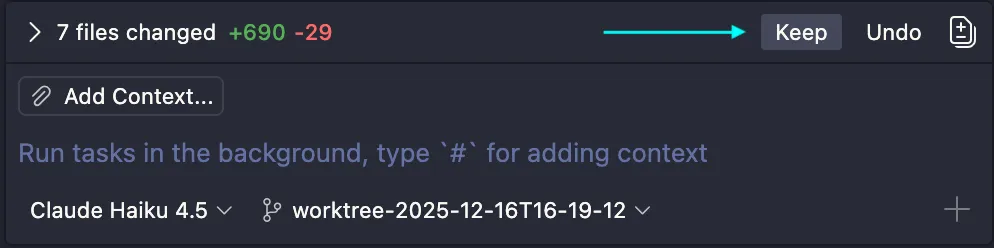
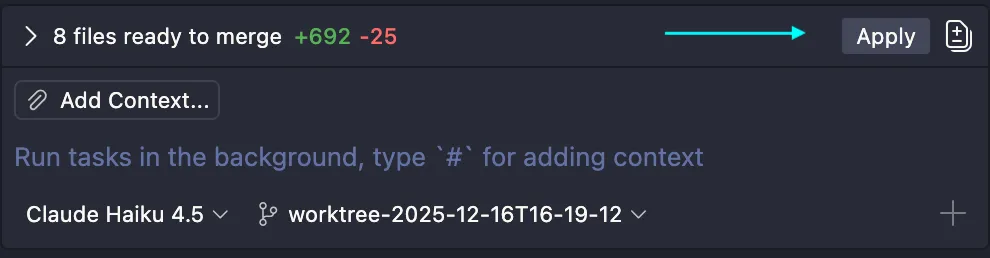
-
After clicking “Keep”, VS Code then presents the option to merge those changes using the ‘Apply’ button:
-
This should have merged in the changes from your worktree into your checkout branch, be it
mainor a feature branch. Ensure you’ve checked out your local branch, and confirm by typinggit statusin your terminal. -
You should see the changes from the background agent’s merged in worktree. Simply proceed as normal to further review and commit those changes.
So as we see, using background agents with worktrees might not adhere to your accustomed flow of using agents in VS Code. However, it’s 1) intuitive and 2) transparent what’s happening here. The changed files stay in a separate .worktrees directory, and we have to explicitly merge those changes into the working branch once complete. [2]
[1]: Note that background agents are different from subagents, as explained here. In fact, the VS Code team doesn’t seem to make the distinction between “background” and foreground (is that a thing?) agents. Instead they just technically refer to them all as “agents”. But for the purposes of this article and the 1.107 release, background agents are asynchronous tasks you pass to the Copilot coding agent (runs on the cloud) or the Copilot CLI (runs on your computer) agent. [2]: I haven’t tested using Git to merge in the worktree changes without using the VS Code UI, but I’d assume that’d work too.